React Native iOS Splash Screen with Storyboard
In June 2019, at WWDC 19, Apple announced that as of April 2020 it would be a requirement to use Xcode’s storyboard to create your splash screen. This was a surprise to me when I saw a tweet from our very own Chris Ball, this past month. As a React Native developer, I have been using react-native-splash-screen for the past couple of years; which relies on .xib files.
At first, I was a little concerned, just one more thing to add to my to-do list, yet a very important one that could keep us from launching our React Native application to the App Store. After my initial reaction, I realized we had a couple of months to figure this out.
When I decided to spend a little time to see how difficult this might be I did not find a lot of documentation for a non-native developer. One of the allures with React Native is that you don’t have to know the nitty-gritty for both iOS and Android, but it can also mean we aren’t as comfortable with some of the tasks that require us to dig into the native side. Spoiler alert, it wasn’t as difficult as I expected, once I figured out the secret. Here is what I learned!

I started with a React Native project in which I already had a Splash Screen that was a .xib file. I opened up my project workspace in Xcode and started to Google for how to use Storyboard. Honestly, I was NOT finding anything that was helping me. I found articles on the developer site that told me about Launch Screens and the Human Interface Guidelines, but not how to create it. A little further down in my search results I found a Stack Overflow article which I thought had promise.
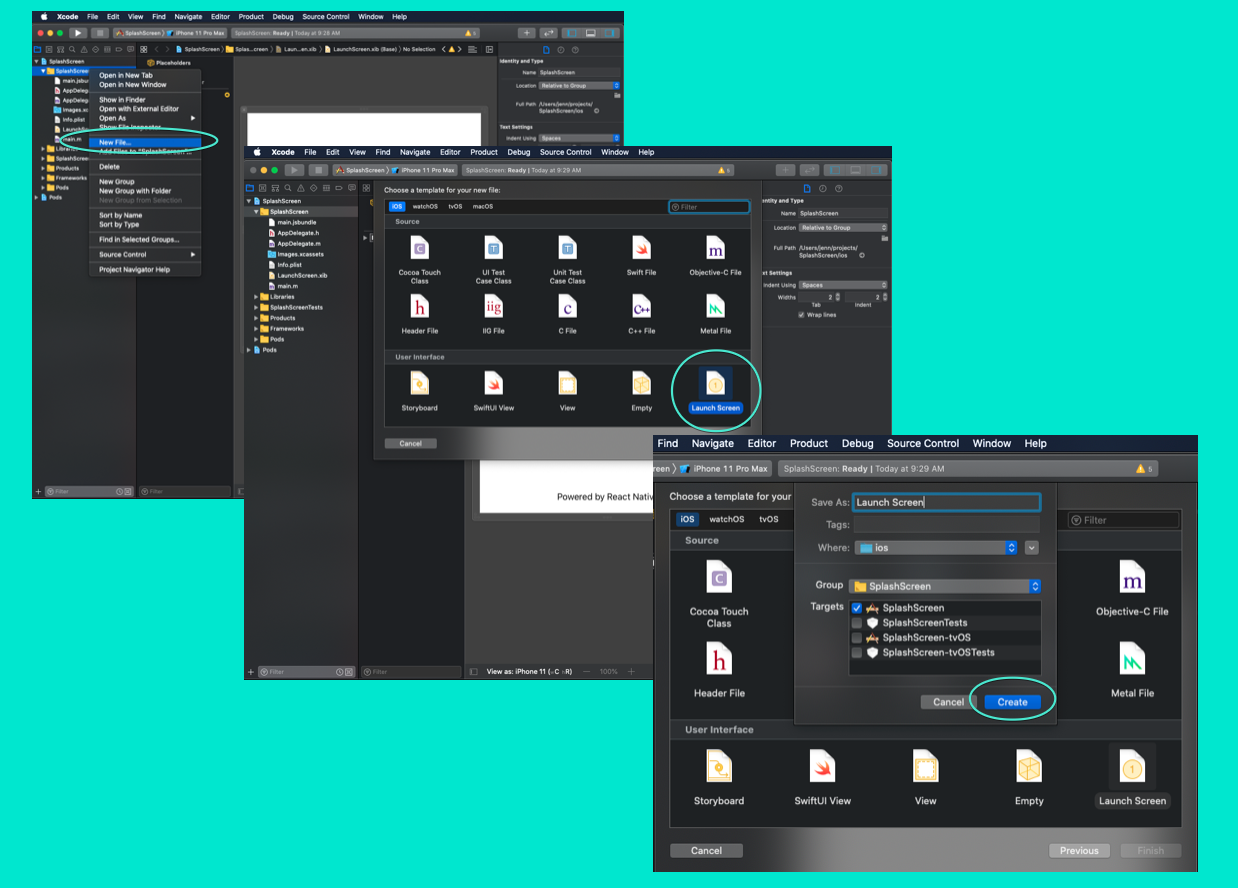
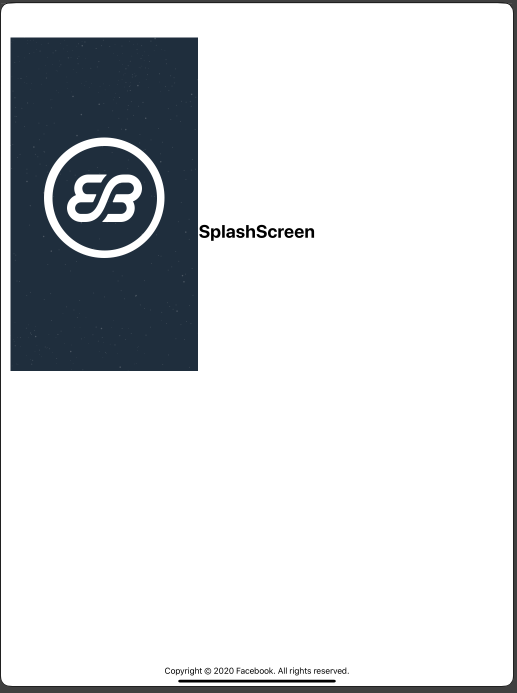
Great! I created my Storyboard file! By default, it set me up with the name of my Application and the Copyright footer. Here is what I had as a starting point with my storyboard. But what next? How do I add my image?
That initial Stack Overflow article I found confused me, it was outdate for an older version of Xcode and I was not finding the options right off hand. I took to my usual style of learning which is to just explore and figure it out. I ended up discovering the + icon in the upper right menu bar and BINGO I was moving forward again.
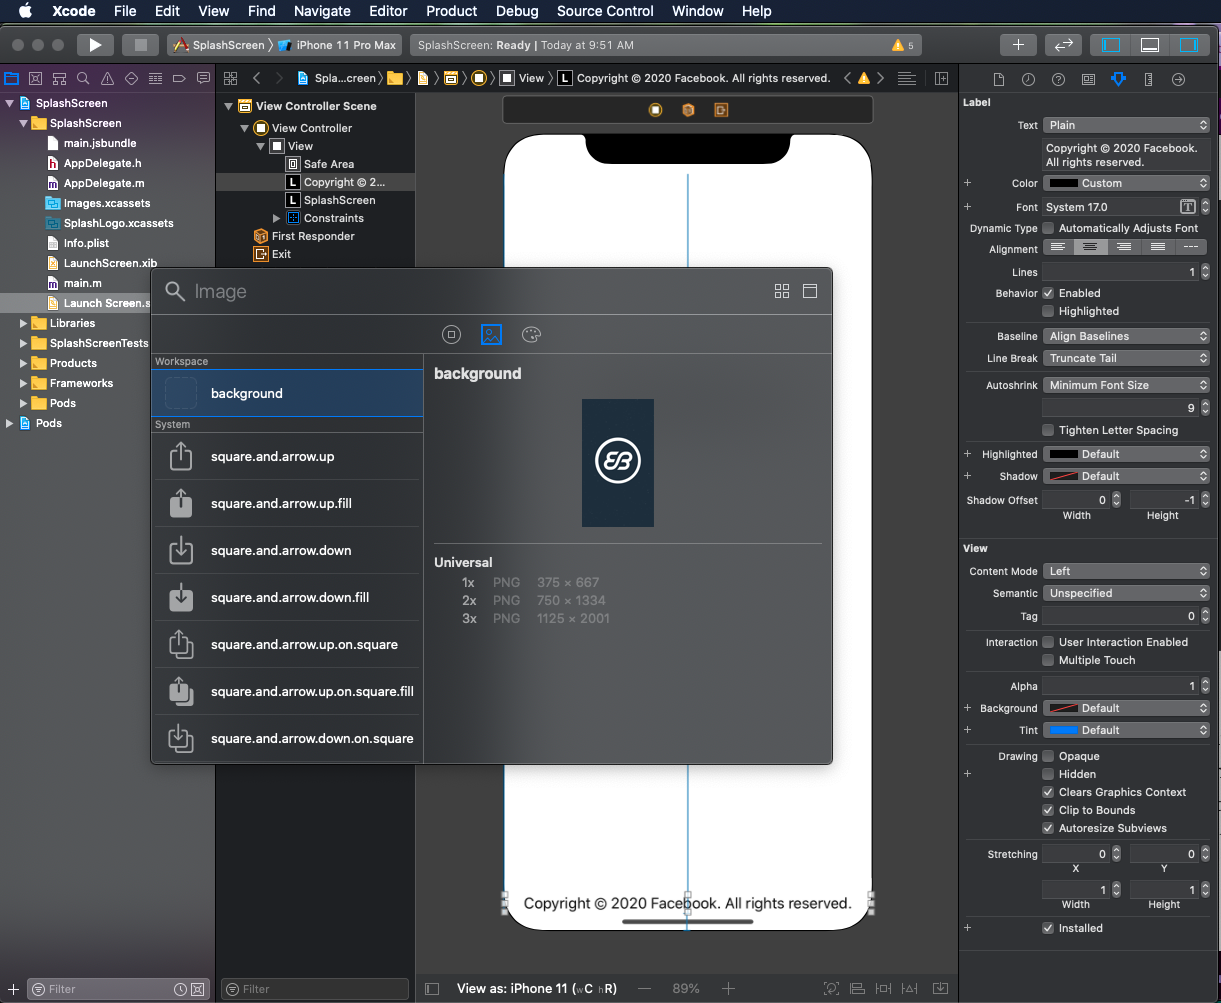
To add the image to your storyboard you drag the item from the left on to your canvas. Once it is there you can start to manipulate it. For demonstration purposes, I have a drastic difference here with the background white and a large image. You can see it here on the iPhone 11.
But if I were to change my display, to say an iPad, things start to look really off! The image we imported is now in the upper left of the iPad display, I see the text I was not seeing before and obviously this is not a consistent user experience based on different devices. Let’s look at how we can make our Splash Screen a consistent experience across devices!
To ensure we have a consistent look we will want to add constraints. Many properties can be used to fine-tune your storyboard, but we will keep it simple.
In the bottom right of the storyboard window, you will find a few icons which I didn’t immediately see in dark mode. The simplest constraints we can add are for horizontal and vertical alignment.
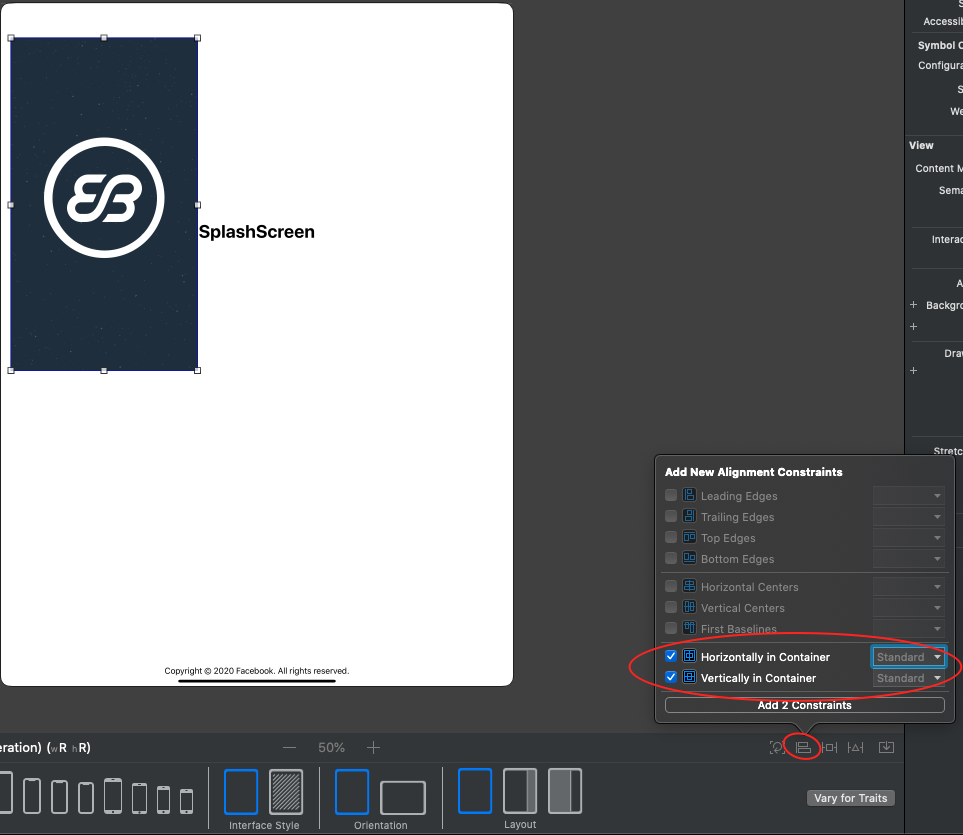
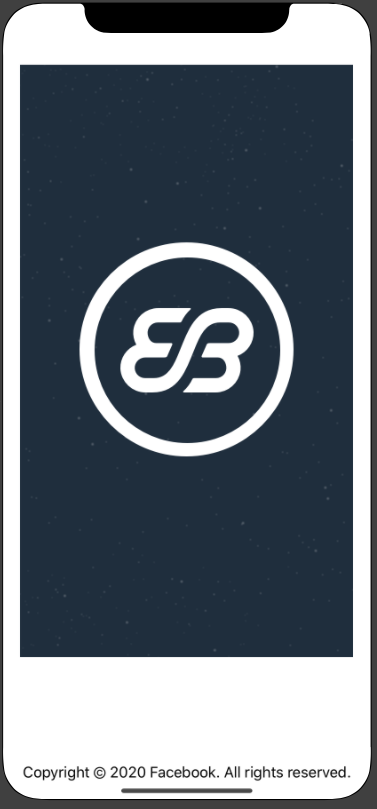
Once I have applied these constraints you can see that I now have the cross hatches displayed on my storyboard to show the view is locked into these constraints. You can also see that when I changed my view back to the iPhone 11 that my image stays where I expected.

These are just the basics of using storyboard! You can get much more detailed with your text and images while creating a consistent user experience across devices.
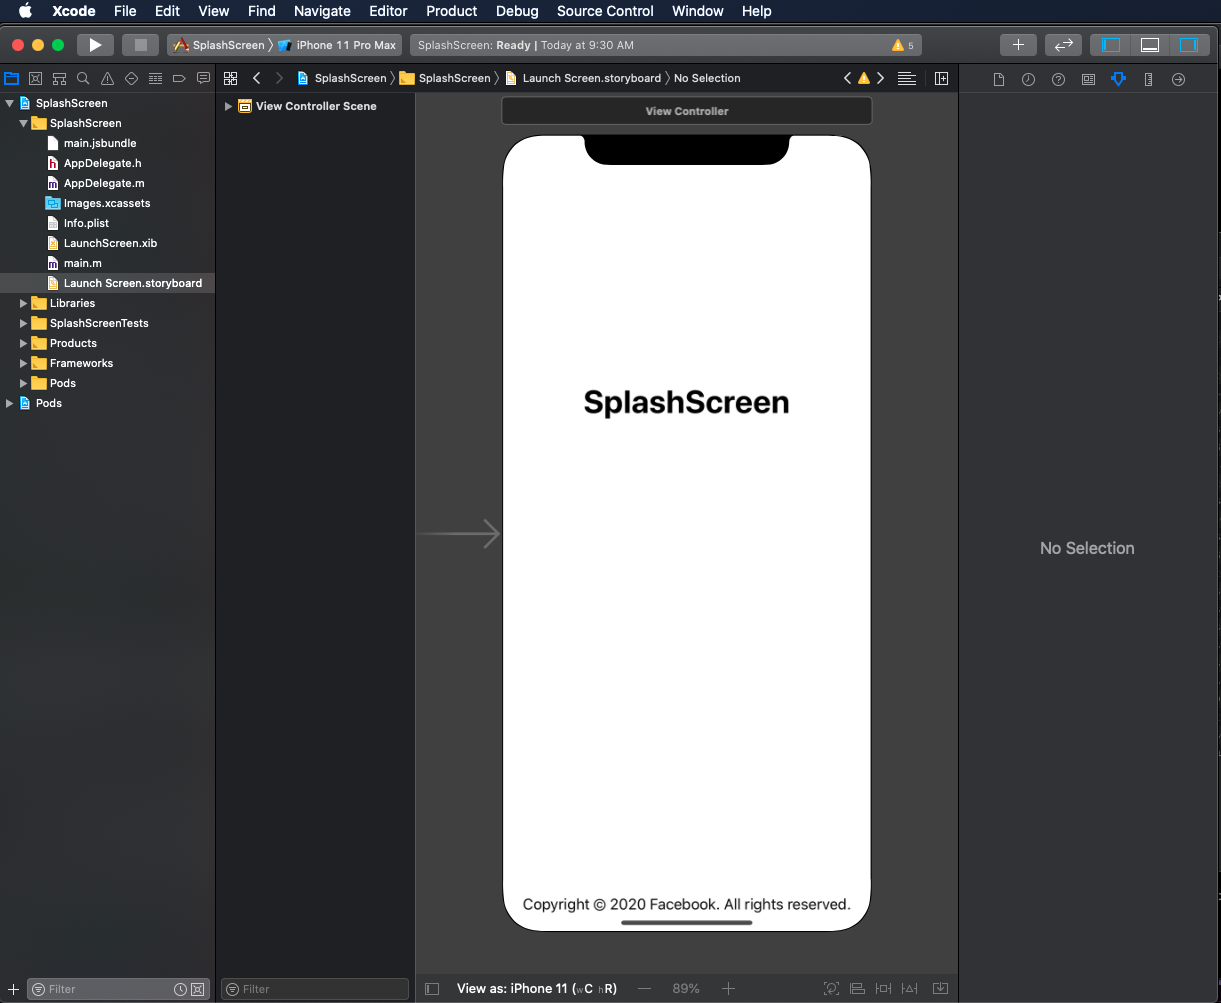
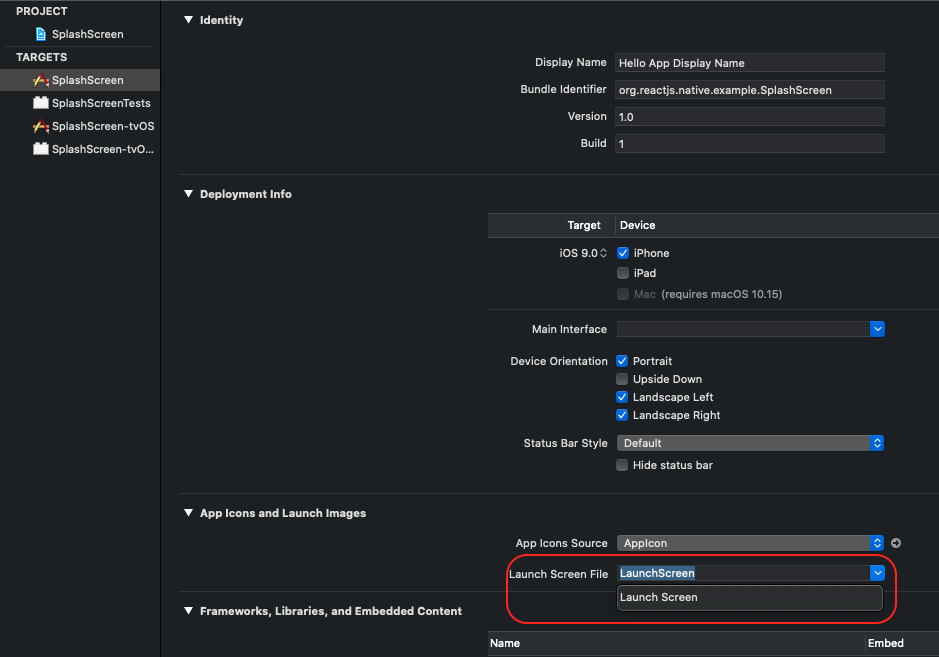
The final step to replace your previous Launch Screen is to ensure that your new file is set as the Launch Screen File in the general settings of your project. In my case the previous file was LaunchScreen.xib and for the new file I used the default name which set it to Launch Screen.storyboard. This wasn’t super clear in making the update, as you can see it does not display the file extension. Once you select the new file make sure you reset your bundler cache and clean your build or you may go crazy thinking that your changes aren’t working.
After I went through this the first time I decided to take what I learned and apply it to another project. Great news, I was able to accomplish this within a matter of minutes! My hope is that with this knowledge, you will be able to accomplish this task just as quickly.
Learn more about our React Native capabilities.


