How to Write Functional Tests in React (Part 1)
This is the first in a series of articles that will help you build a solid foundation for testing React components.
At the beginning of the year, I set a goal to improve my code quality by focusing more on testing. I tried a handful of libraries and methods like Enzyme, react-test-render, and snapshot testing. I eventually landed on react-testing-library.
What is react-testing-library?
react-testing-library (RTL) is a testing framework created by Kent C. Dodds with the guiding principle of
The more your tests resemble the way your software is used, the more confidence they can give you.
How is RTL different than other frameworks like Enzyme?
RTL structures your test in a way that doesn’t include the implementation details of your components. As such, when your components are refactored in the future (to change implementation but not functionality), your tests do not break and your time isn’t spent fixing it.
Unlike Enzyme, RTL will test DOM nodes instead of component instances if said component is related to rendering. If you’d like an in-depth analysis, Kent C. Dodds has a comprehensive article about his dislikes with shallow rendering in Enzyme.
The TL;DR is that RTL does not include a lot of the utilities that Enzyme has (such as shallow and instance) because they
are things which users of your component cannot do, so your tests shouldn’t do them either.
How can I use RTL effectively?
We’ll create some basic tests for asserting form inputs. Here’s what our component will look like:
Our Component
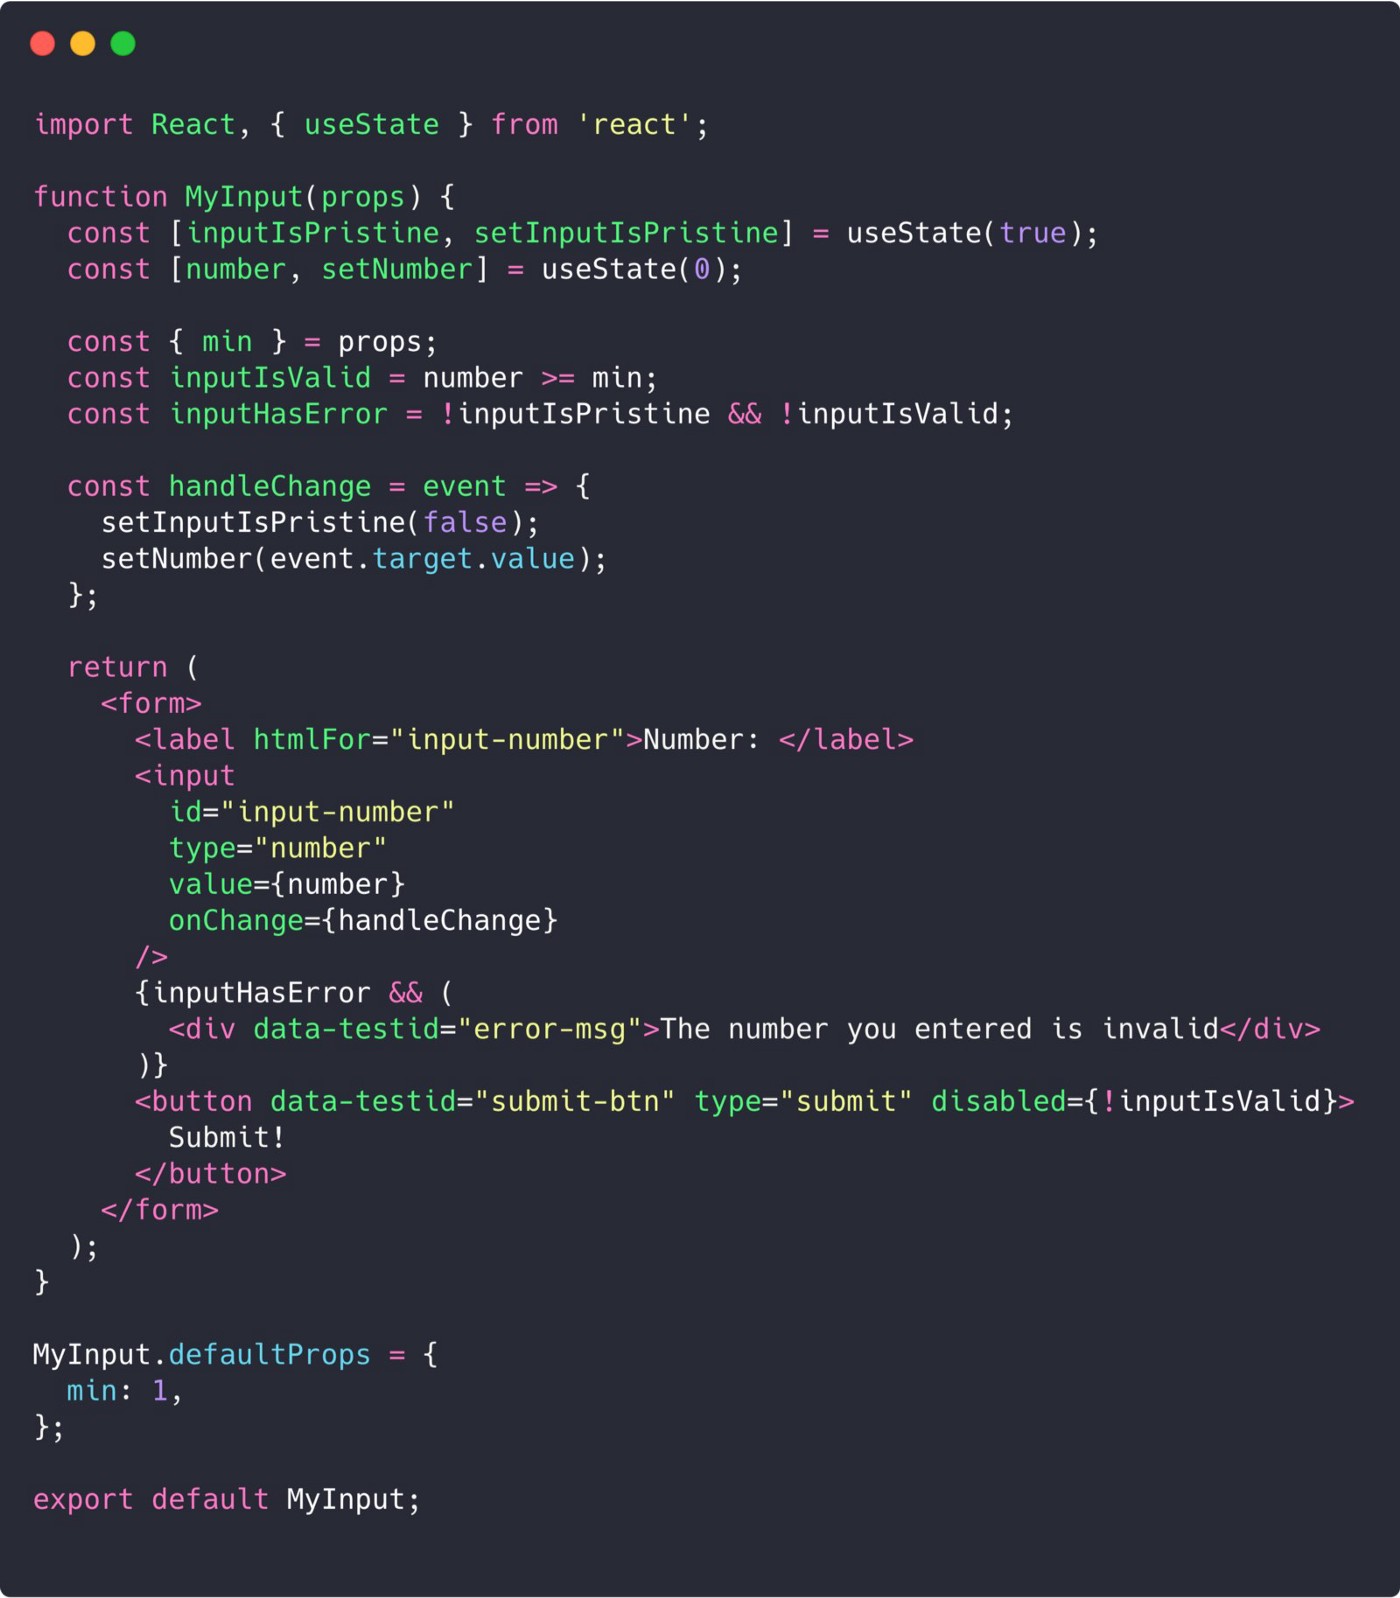
MyInput.js (but it’s actually a form 🤫)
- On the initial creation of this functional component, we assign
inputIsPristine = trueandnumber = 0with theuseStatehook - When the user types in the input we fire the
handleChangefunction and setinputIsPristine = falseandnumberto the user’s input - The
error-msgis shown withinputHasErrorwhen the input is no longer pristine (user types something) nor valid (less than 1) - The
submit-btnis disabled when the input is not valid (less than 1) data-testidis an attribute used by RTL to find elements
Note: I call the component MyInput and I realize it isn’t technically an input since it’s wrapped in a form, but I did it so I could have an easy way to use the submit button with the input.
Our Test File
Assuming you already have jest installed in your app, we will also be installing a few other libraries. Here’s what the top of your test file will look like:
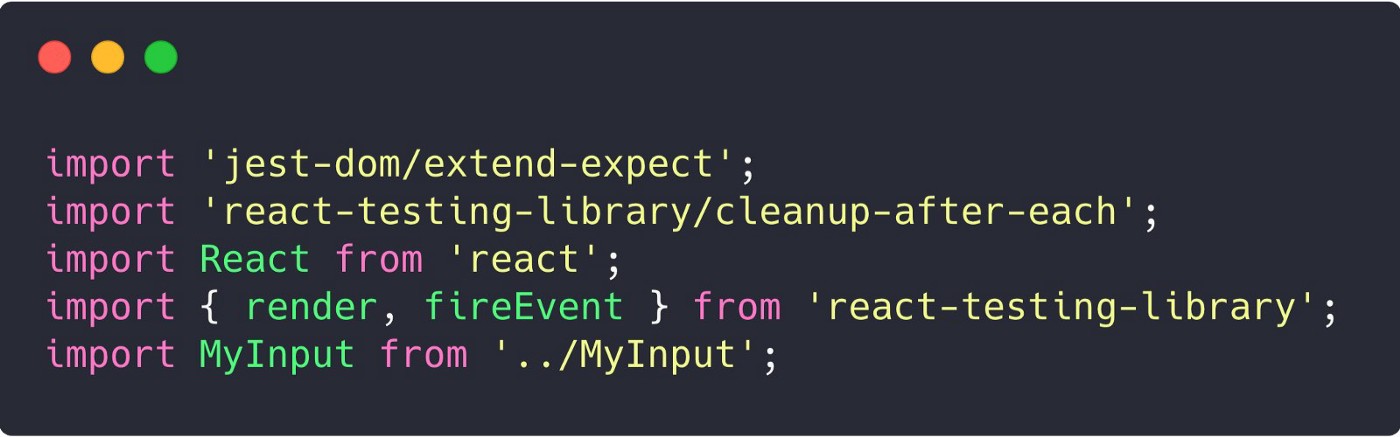
MyInput.test.js
- We will be getting a few extra and helpful assertions from
jest-dom/extend-expect - Because
react-testing-librarymounts our components todocument.body, we will be using itslceanup-after-eachwhich will unmount and clean up our DOM after eachest - I will go into detail about
react-testing-library'srenderandfireEventfunctions later on
Our Test Utilities
render
The render method is the bread and butter of RTL. In this following example, I’m showing what RTL’s render method is doing under the hood. My next example (getByLabelText) will demonstrate how to use render in our tests.
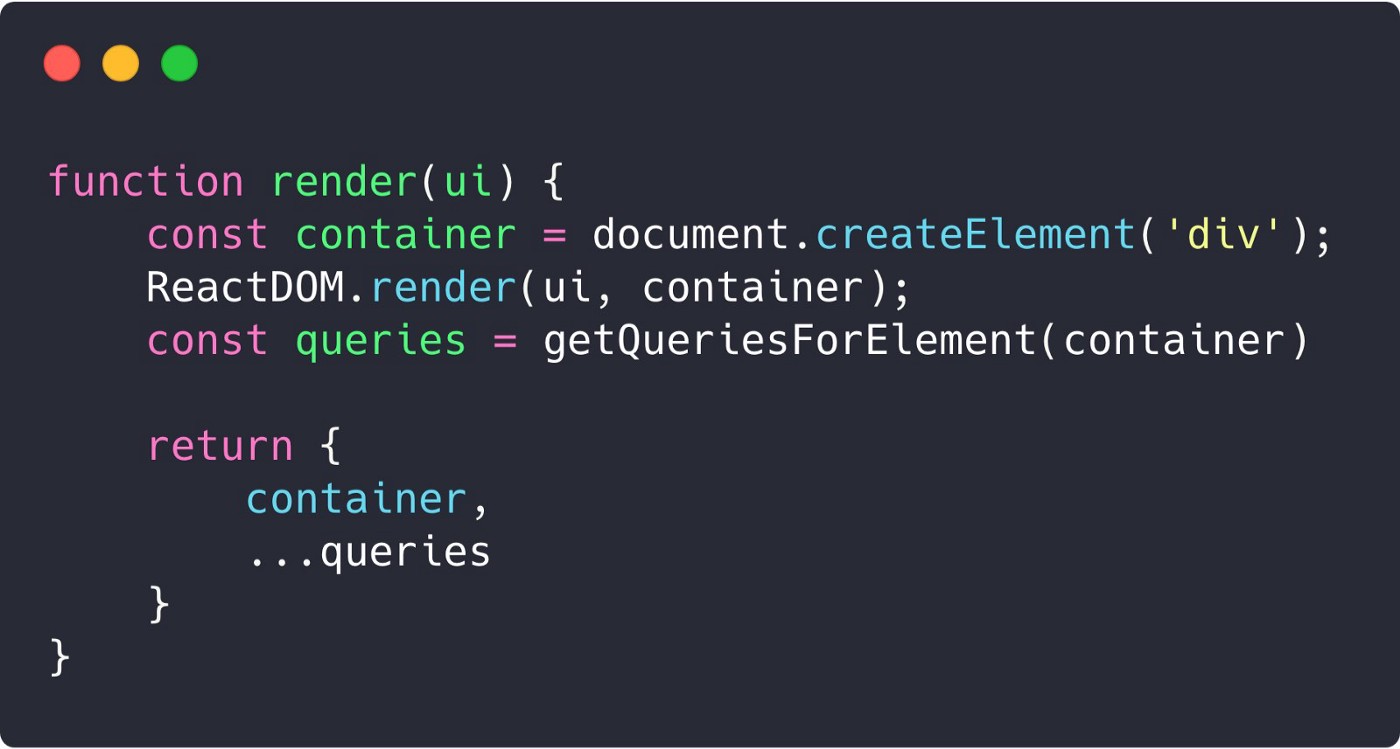
What RTL’s render method sort of looks like
- The component
(ui)that’s passed to it gets rendered on acontainer - RTL’s utility methods (ie.
getByLabelText, etc) are all extracted and assigned toqueries - These methods are then spread on the object that is returned so that we can destructure out the utilities that we need
getByLabelText
The getByLabelText utility works well for getting an input element and its associated label.
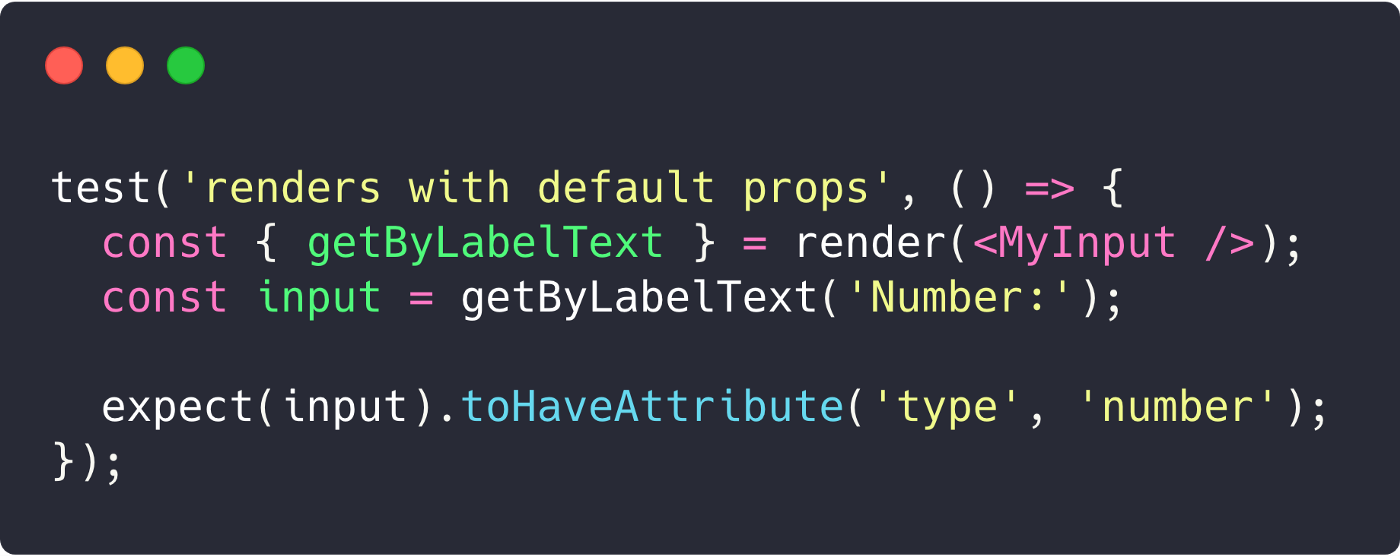
react-testing-library'srenderfunction mounts our component to the DOM and exposes a handful of utility methods (getByLabelTextin this case)- We pass the text of the label
'Number:’togetByLabelTextand it returns theinputthat was associated with thelabel - We then make an assertion on the
inputthat it has an attributetype='number'
Note: getByLabelText works here because of the relationship we created between the label and input in MyInput.js. The htmlFor in the label element matches the id in the input element.
If we didn’t create the association between label and input or made a typo in the htmlFor like calling it inpoot-number, RTL would throw us an error:
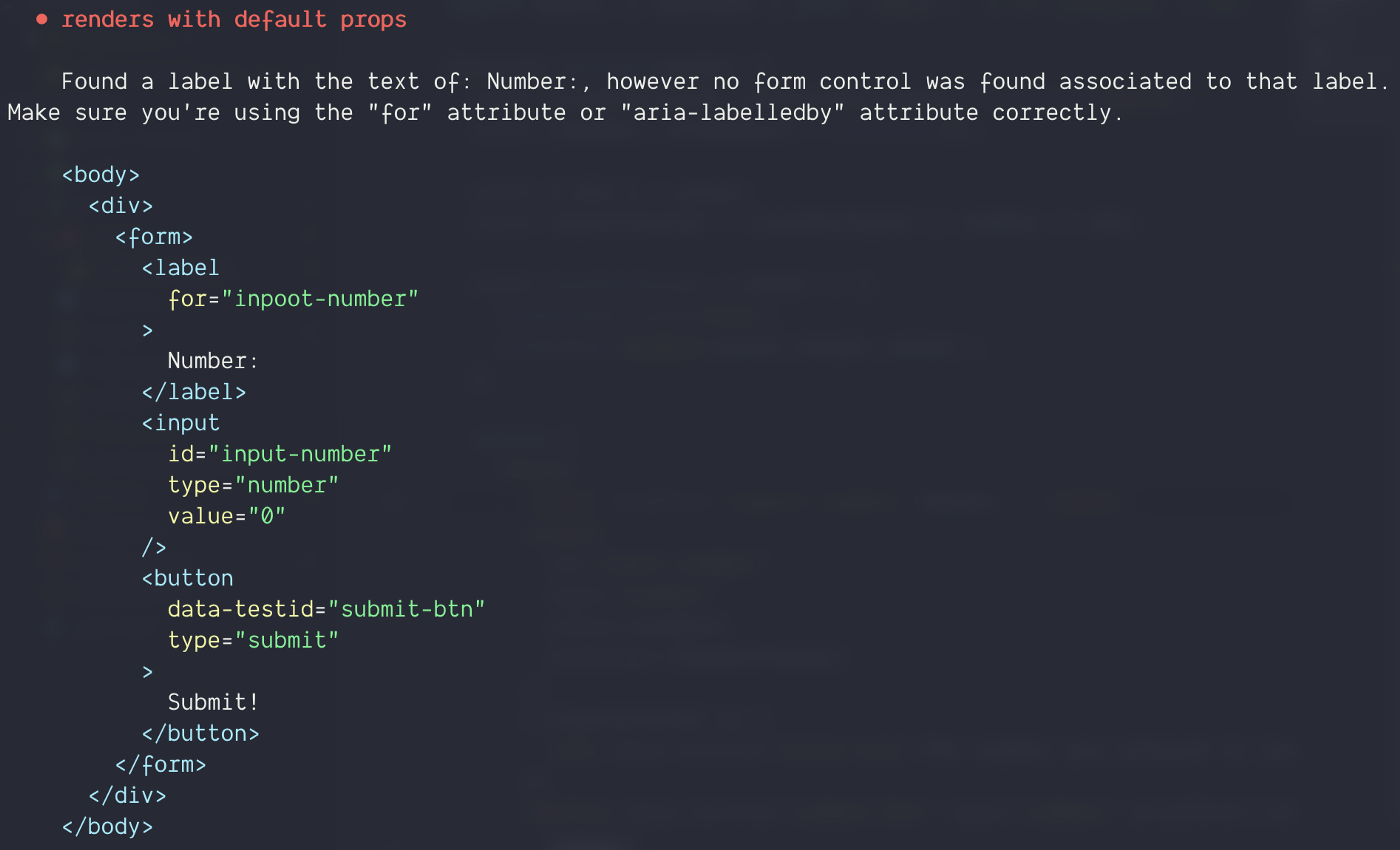
RTL’s enforcement of this relationship is great for catching typos and keeping accessibility high!
getByTestId
This is a method I really like about RTL. Remember that data-testid attribute we added to button? The getByTestId utility is what we’ll use to target it.
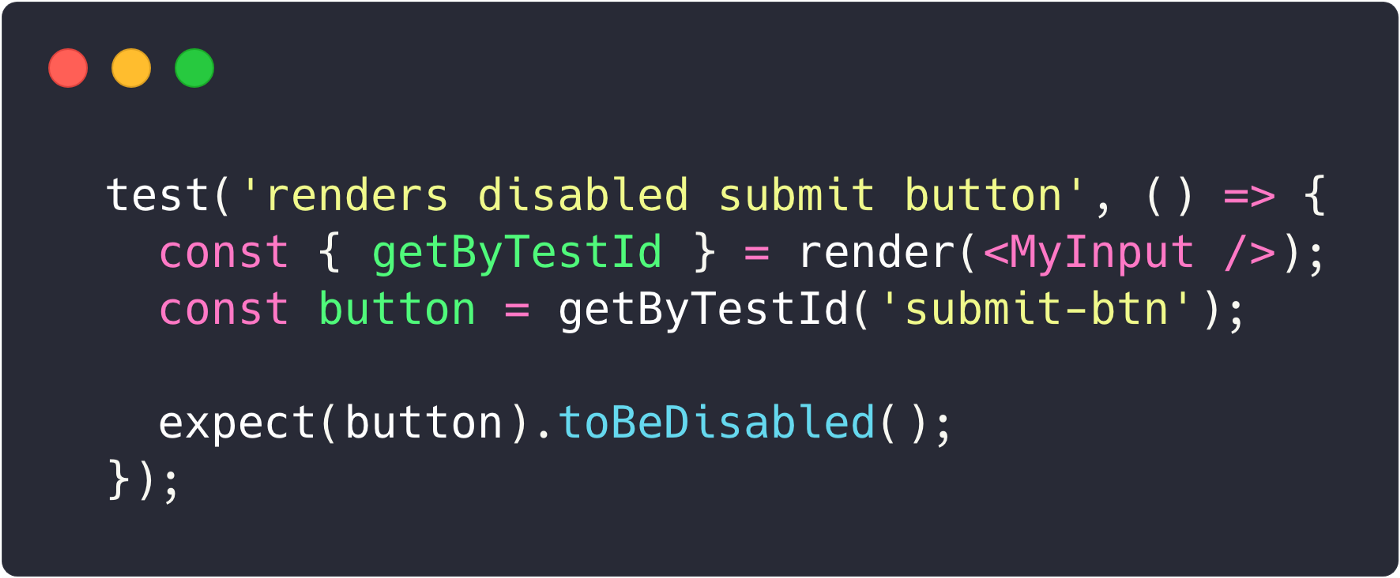
- We use RTL’s
getByTestIdmethod to find an element with adata-testid="submit-btn" - Because of
defaultPropswhere we set-->min = 1-->, and our initial state where we setnumber = 0— we expect our button to be disabled since our input is not valid
Typically, you’ll want to use getByTestId when targeting a specific element — it’s great for looking up inconspicuous divs or other elements in weird places.
getByText
This is a pretty general method that looks for any matching text that’s passed as an argument.
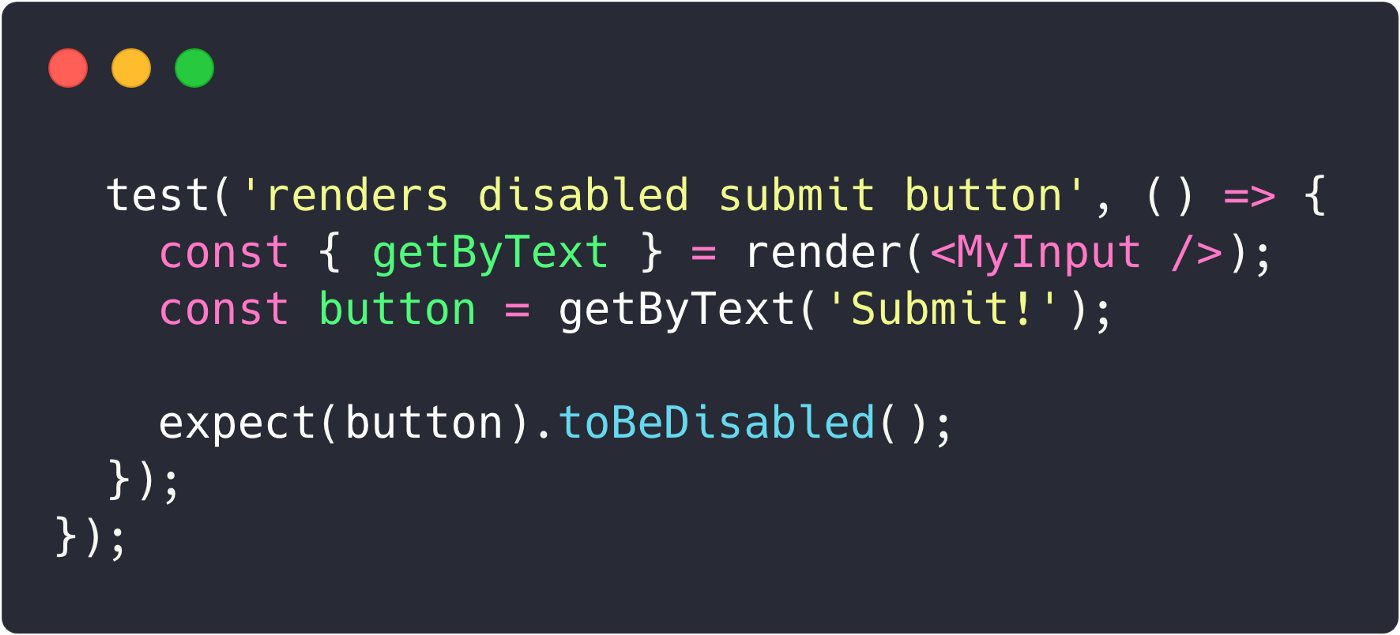
This is the same test we did with getByTestId except here we use getByText and pass it the button text “Submit!”
I tend to prefer using getByTestId & data-testid attributes over getByText, as the former method reduces the scope and allows me to pinpoint the exact element I’m asserting.
fireEvent
The fireEvent method is used to manipulate the DOM based on some sort of event. The list of events spans from change to wheel(the full list can be viewed here).
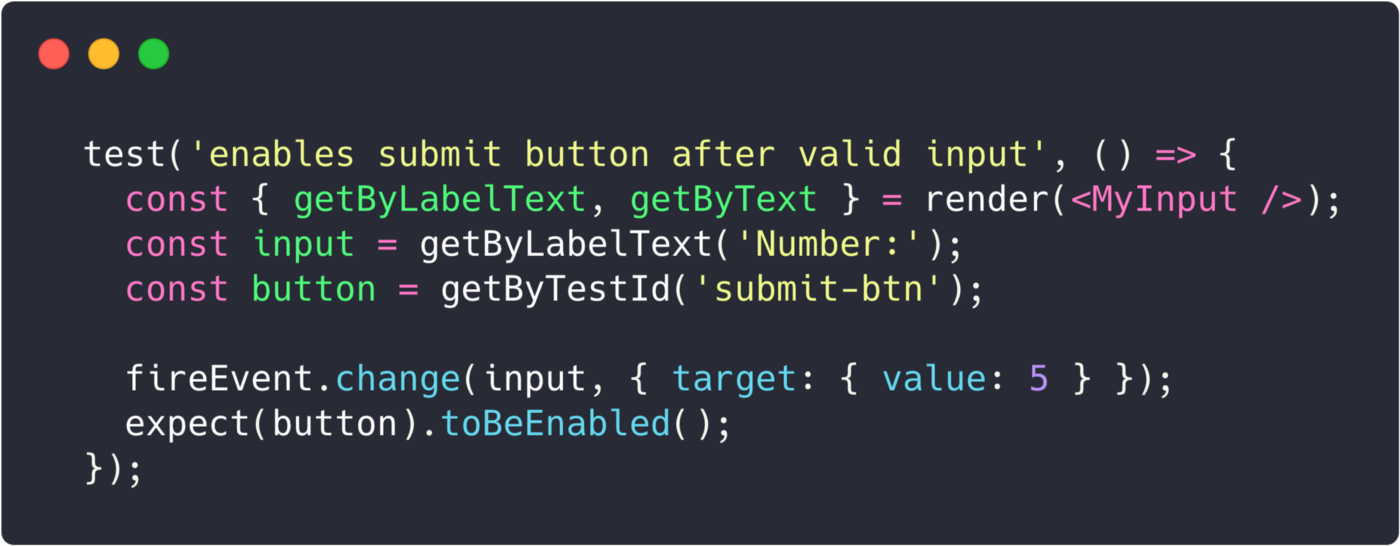
- First, we assign
inputandbuttonvariables to the elements that we found using the methods we used earlier - Next, we call
fireEvent.changeand pass it an object that is similar to the one we used in ourhandleChangefunction inMyInput.js
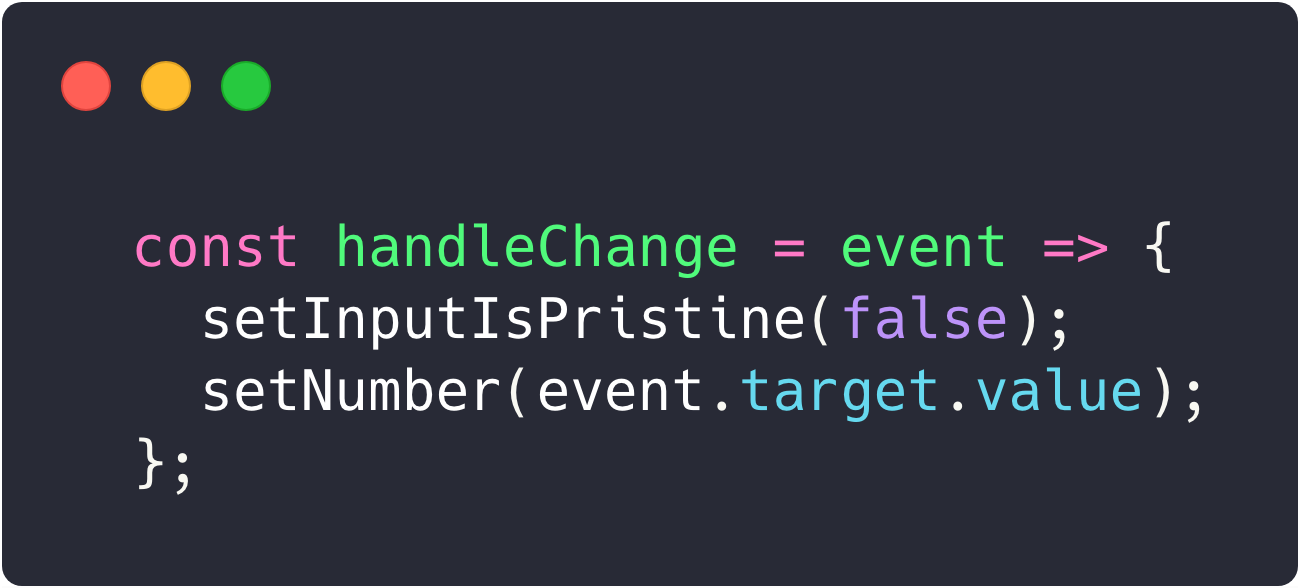
handleChange in MyInput.js
- In our
handleChangefunction we set the number state withevent.target.value, so in the same fashion with our test we pass it the object{ target: { value: 5 } } - Finally, we expect that the button is enabled because any number greater than or equal to our
min(which is set as 1 from ourdefaultProps) should be a valid input, thus enabling the button
rerender & queryByTestId
This is a two-parter to show how you can test for something to NOT be in the DOM.
For rerender, I typically use it to assert the outcome of a component after updating its props.
queryByTestId is very similar to getByTestId. The difference between the two is that getByTestId will throw an error when it can’t find the element and queryByTestId will return null. All the other getBy.. methods have similar queryBy.. methods.
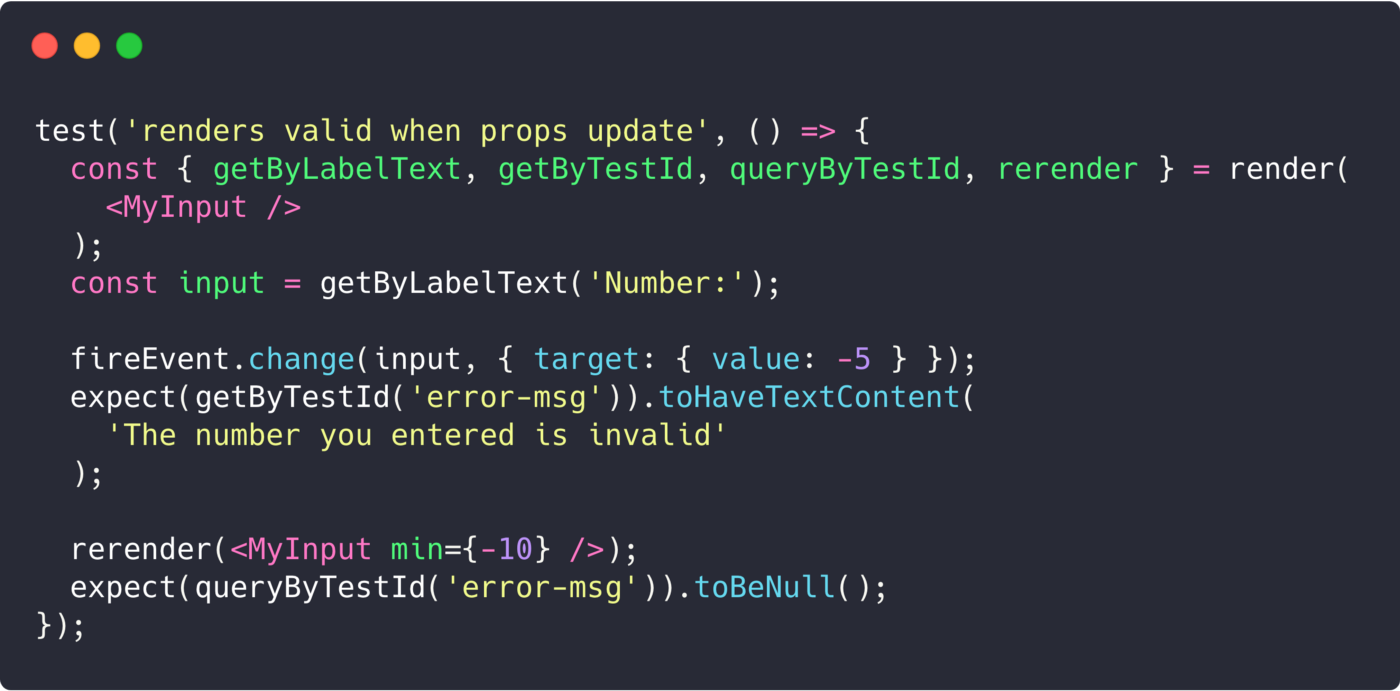
- Just like before, we assign the variable
inputto the element associated with the label text “Number:” - We call
fireEvent.changeand change the input to-5 - The input’s value is now less than our
min (1)which is defined in ourdefaultProps, so we expect theerror-msgto be present - Now we call
rerenderon ourMyInputcomponent and update theminprop to-10 - Now that our input’s value
-5, is greater than our updatedmin-10, we expect theerror-msgto not exist (toBeNull)
Bonus: debug
RTL’s debug method will log out the current structure of the DOM where ever you place it. Very useful for peeking at the state of your DOM during different parts of your tests.
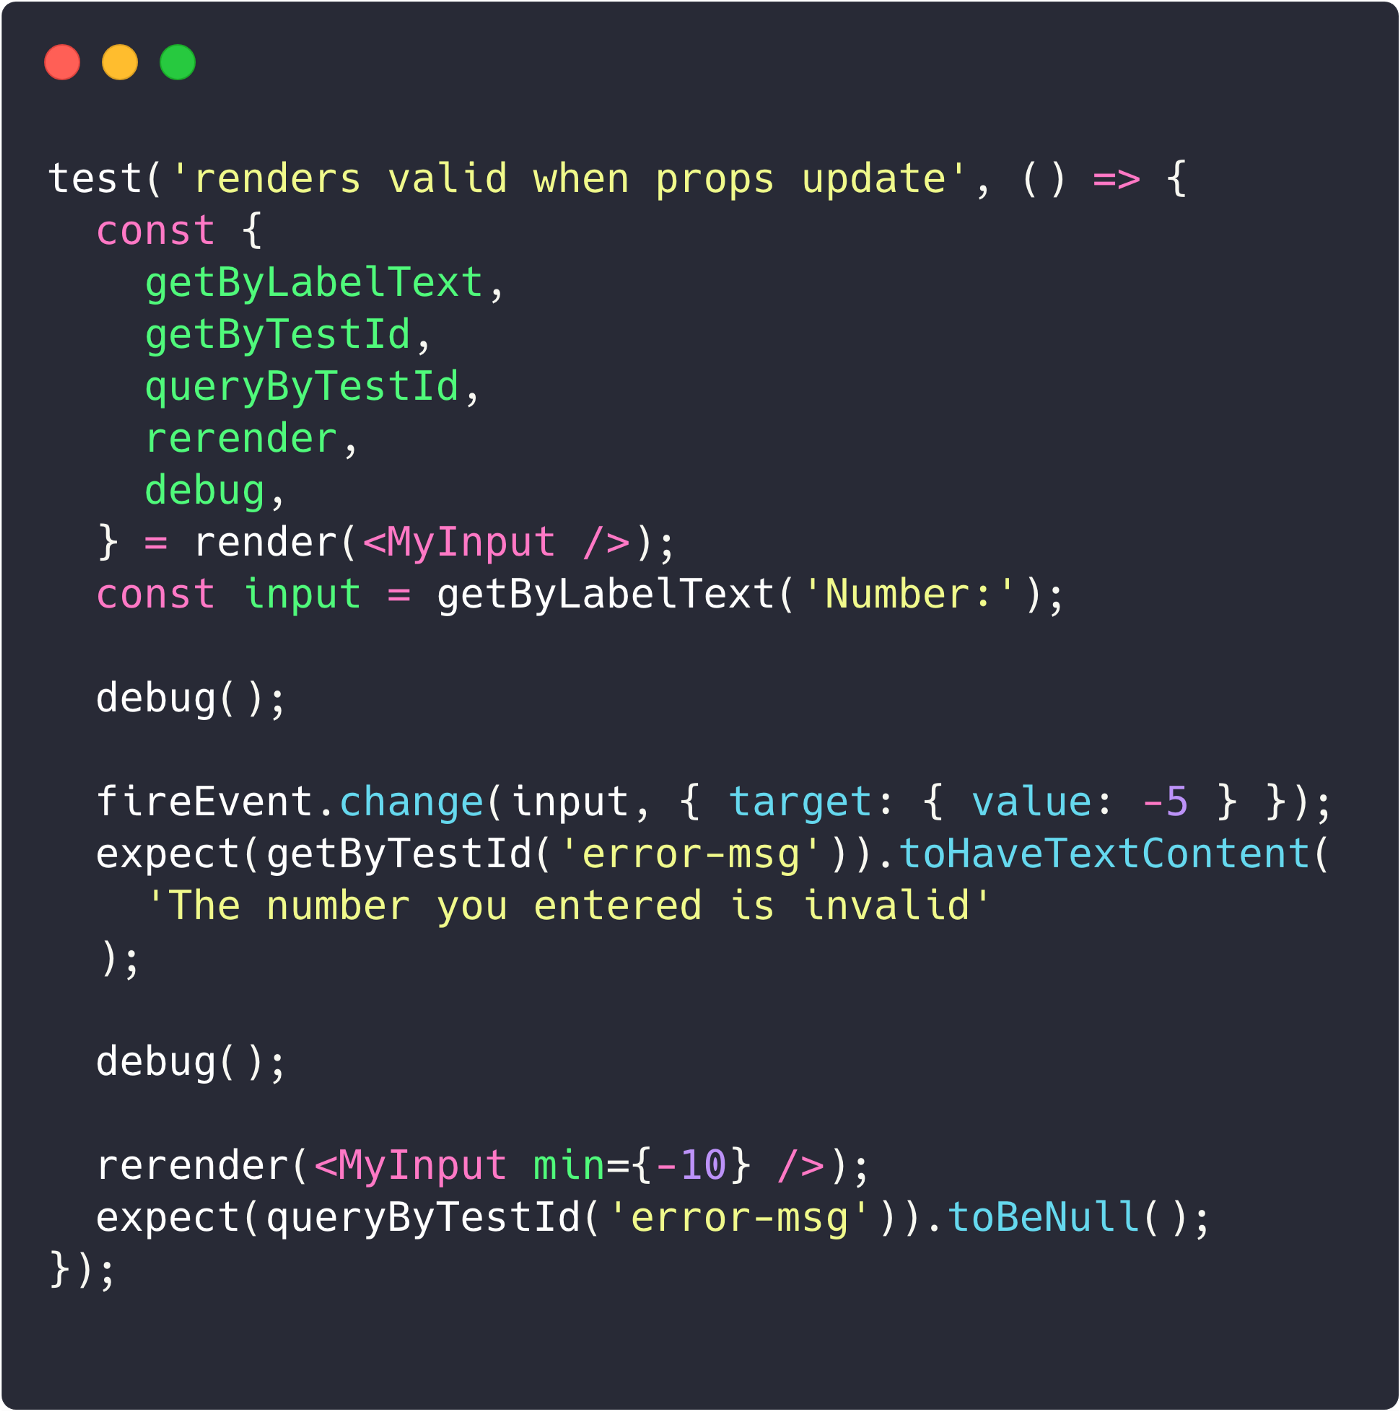
- Deconstruct
debugout of therendermethod - Here we place it before and after we call
fireEvent.change - Run our test and we’ll see this in our console:
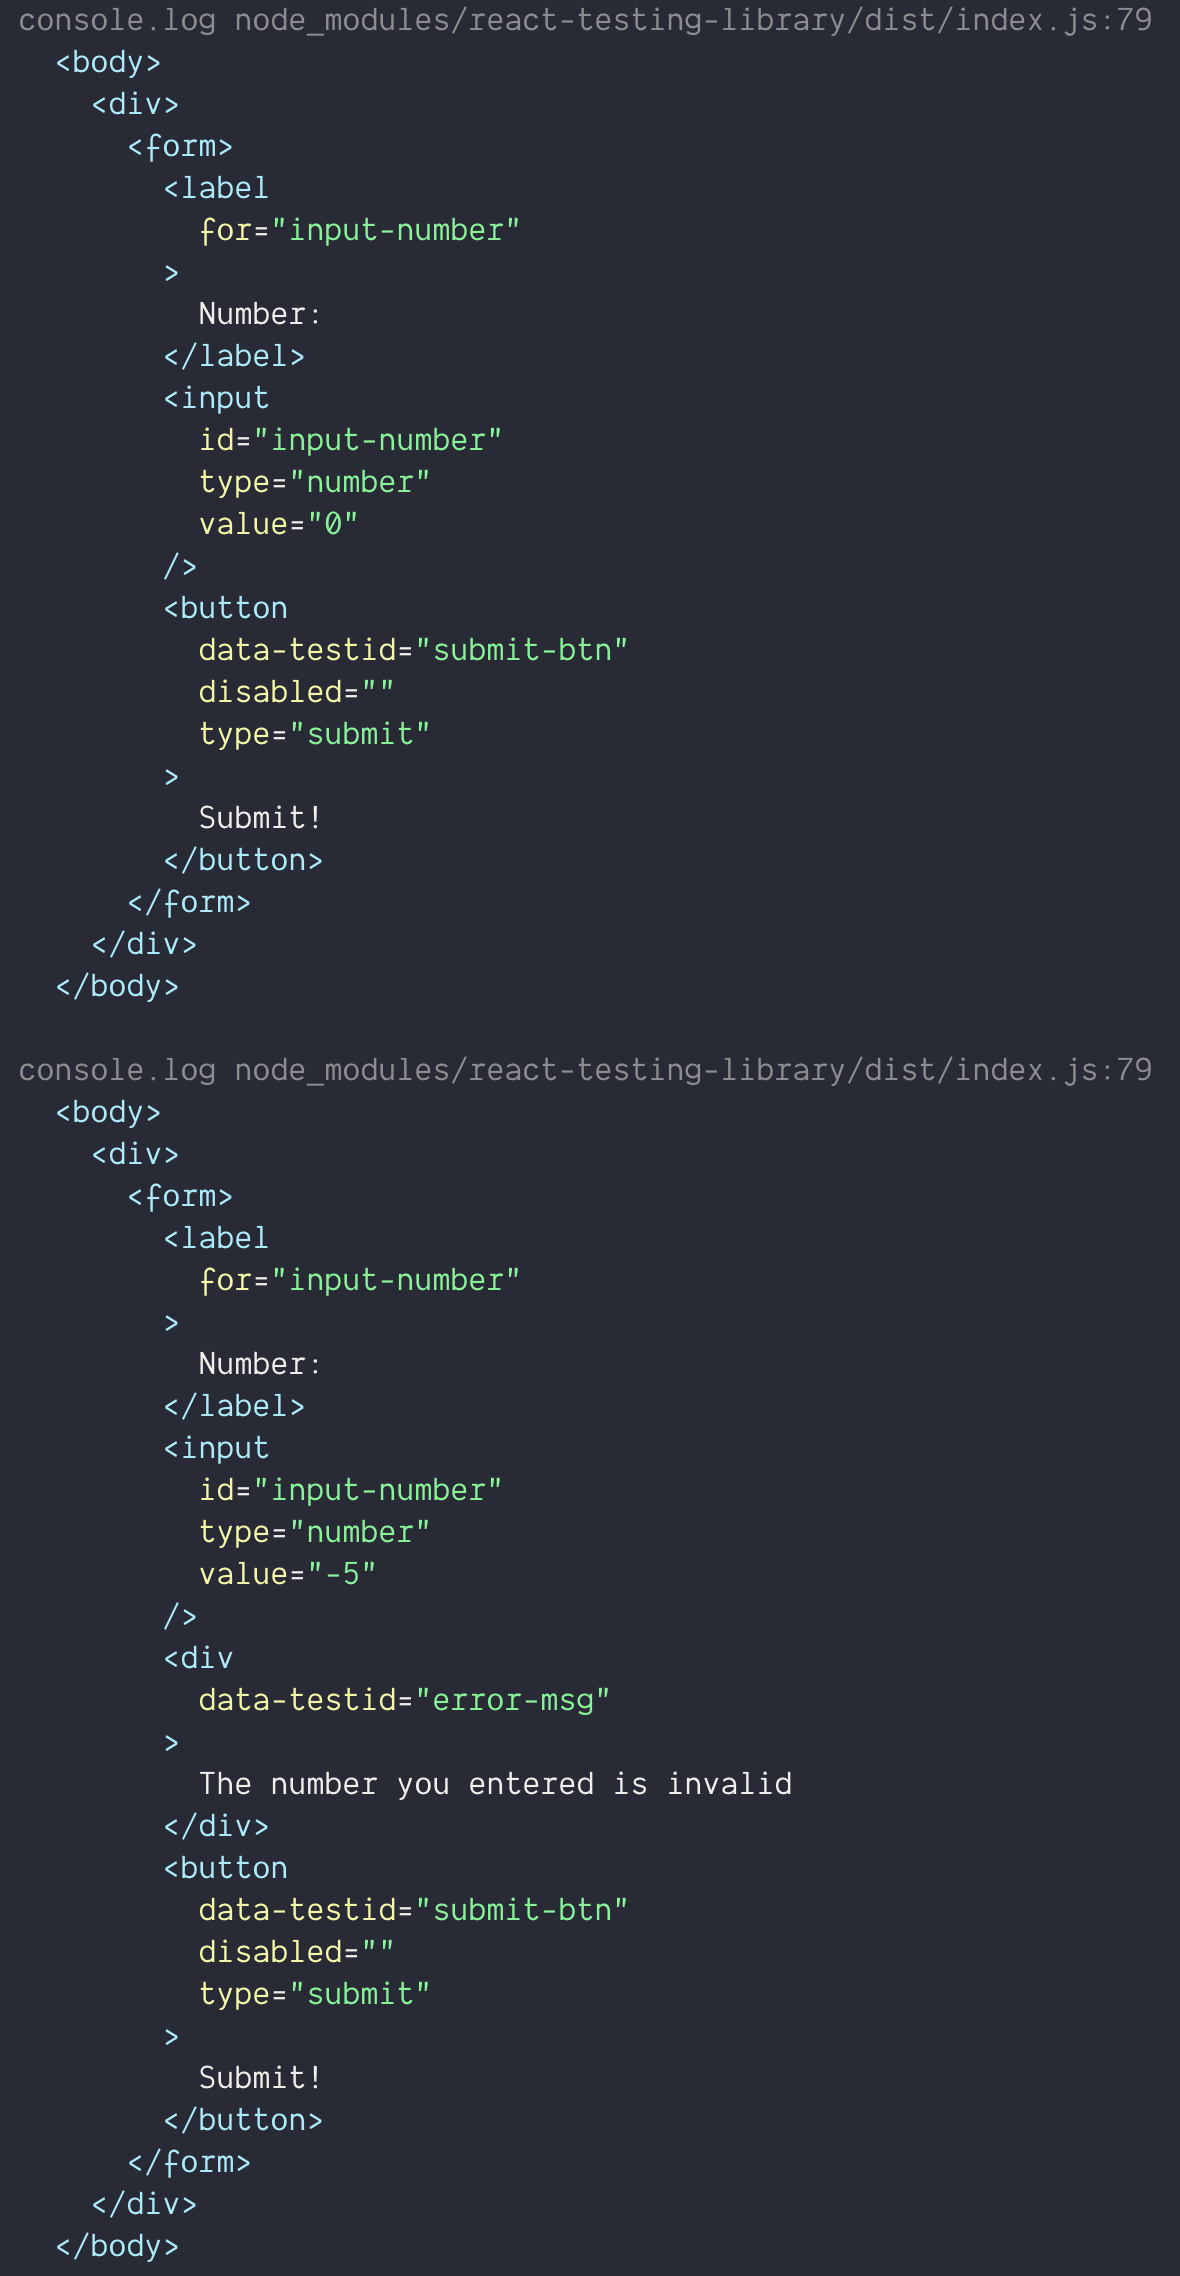
Two debugs, two outputs!
- In the first output, before we call
fireEvent.changewe see our input’svalue = "0" - In the second output, after we call
fireEvent.changewe see that our input’svalue = "-5"and there’s also the inclusion of anerror-msg divnow
Conclusion
Hopefully, this walkthrough gave you a good idea on how you can implement RTL in your next (or even current) project. It’s a great way to test your components in a way that mimics your users’ interactions.
All of the examples can be found on github, or you can try it out instantly on repl.it.
If you have any other testing tips, don’t be afraid to send them my way! I just started my testing journey and would love to learn more about how to make my application more bulletproof. Also, be sure to stay tuned for the next part of this series where I will dive even deeper into testing! 🐐


