An Intro to Web3 Development
In my previous post, I talked about the basics of Ethereum at a higher level as an introduction to people just coming into the field of crypto. In this post (and future posts), I’ll be taking it deeper into the specifics of Web3 development using Node scripts and web3.js. For the full code example, check out the GitHub repo.
Set Up Test Wallet
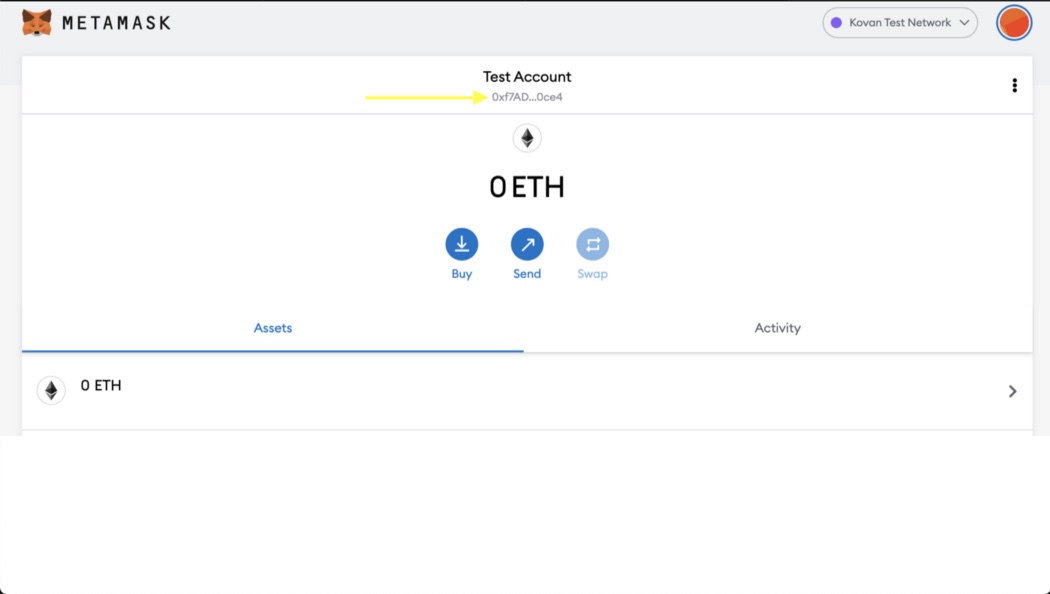
The first step to developing on the blockchain is getting a test wallet set up. There are many ways to do this, but we’ll do it through metamask. If you already have a test wallet with a public address, you can skip this step.
First, install the metamask chrome plugin and then create a wallet. The main information you need now is the public address listed under the account name.
Add KETH To Wallet
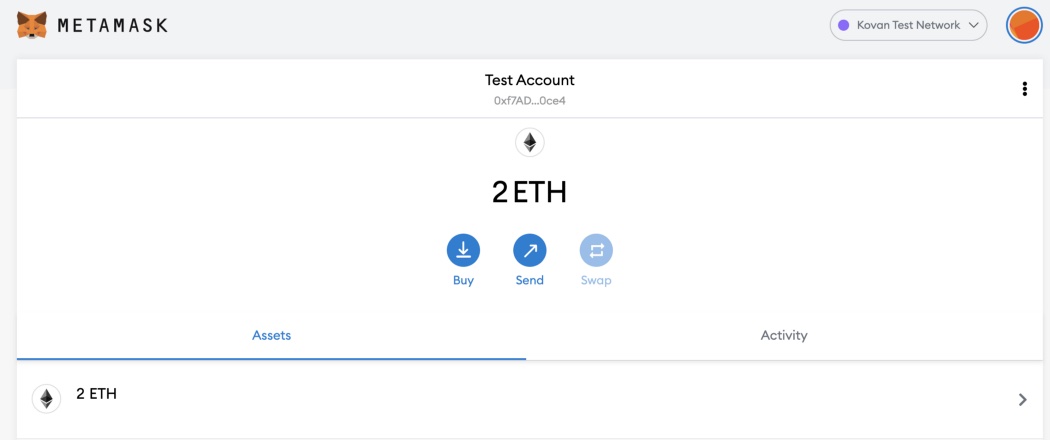
Now we need to actually get some test tokens added to our wallet. You can use any testnet to do this, but for this article we’ll be using Kovan. Testnets are replicas of the mainnet blockchain that allow you to do interactions for free, and a faucet is a way to request tokens for use on these testnets. In order to get ETH in Kovan (KETH), you need to go to the Kovan faucet, login with GitHub, and put your public address for your test wallet in.

Hit Send me KETH!, then you should see it show up in your metamask wallet in a couple seconds. The default amount sent from the faucet is 2 ETH, which should be plenty for what we need.
Add Kovan DAI To Wallet
Since KETH is the native token on the Kovan network, it is a much simpler process to get and view those tokens in your wallet. If we wanted to add another test token to our wallet, like Kovan DAI, that gets a little more complicated.
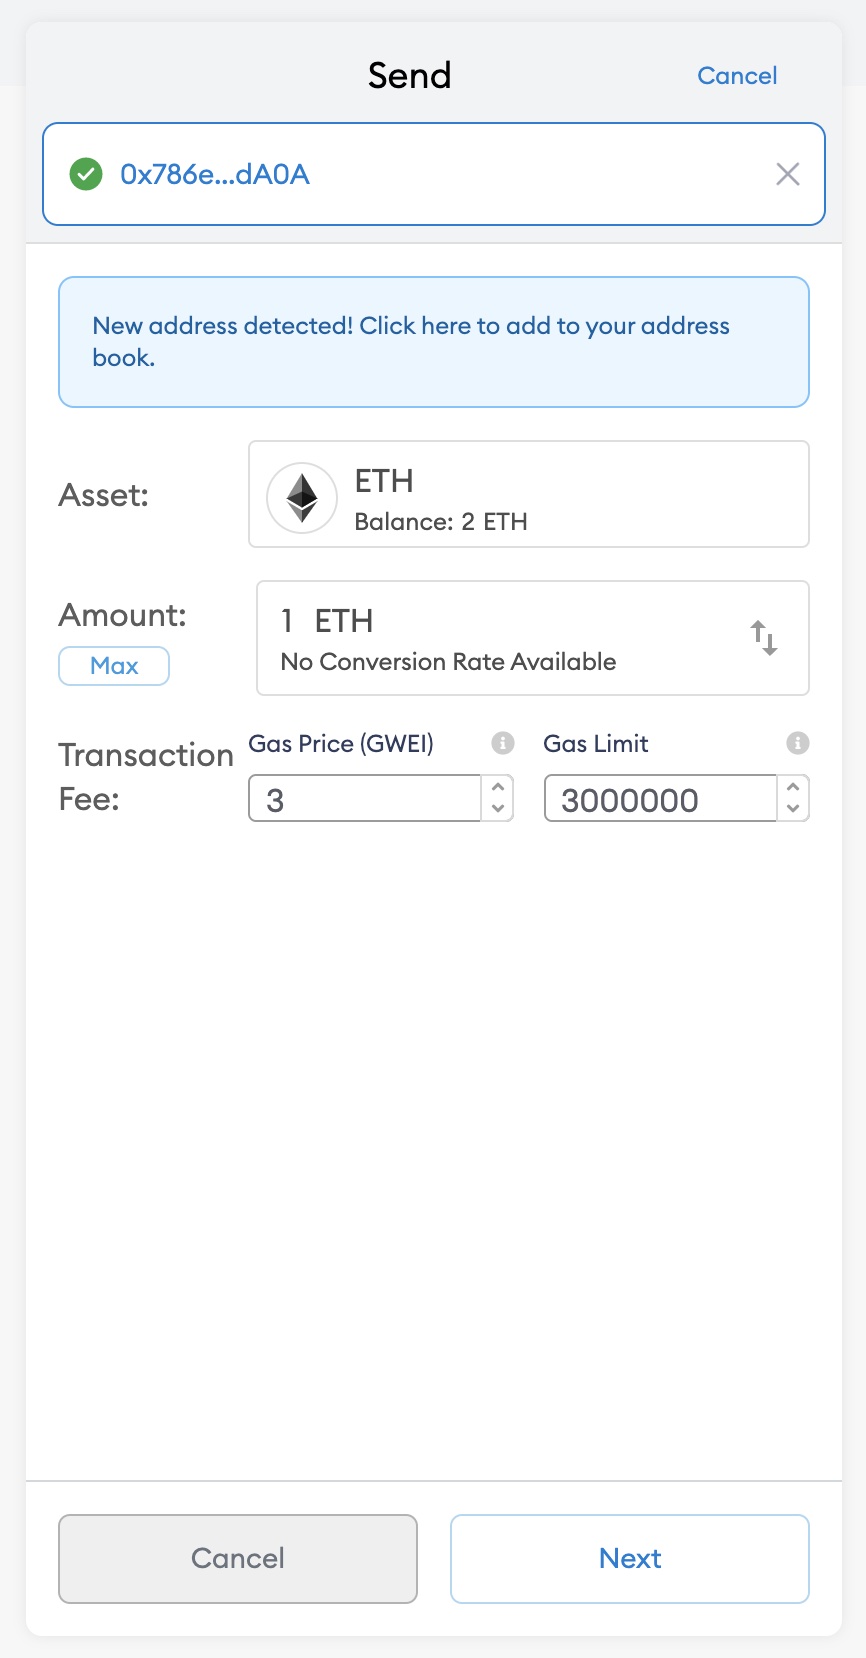
The faucet for Kovan DAI isn't as simple as KETH. Luckily, someone deployed a smart contract that does this for us, so all we need to do is send some of our ETH to the smart contract, and it will send Kovan DAI to our wallet. Hit the send button in metamask, and put the following address: 0x786e3c83cd270414649079A758Ad92f961EDdA0A. This address is the location of the deployed contract, so you want to use this exact string. You can send any amount, as long as you have it in your wallet, and then set the gas limit to 3000000. The gas limit refers to the maximum amount of gas you are willing to spend for a transaction, so setting it to a high value doesn't mean that's how much you will use, but this limit is the minimum that the faucet requires.
Once that's done, hit Next and Confirm.
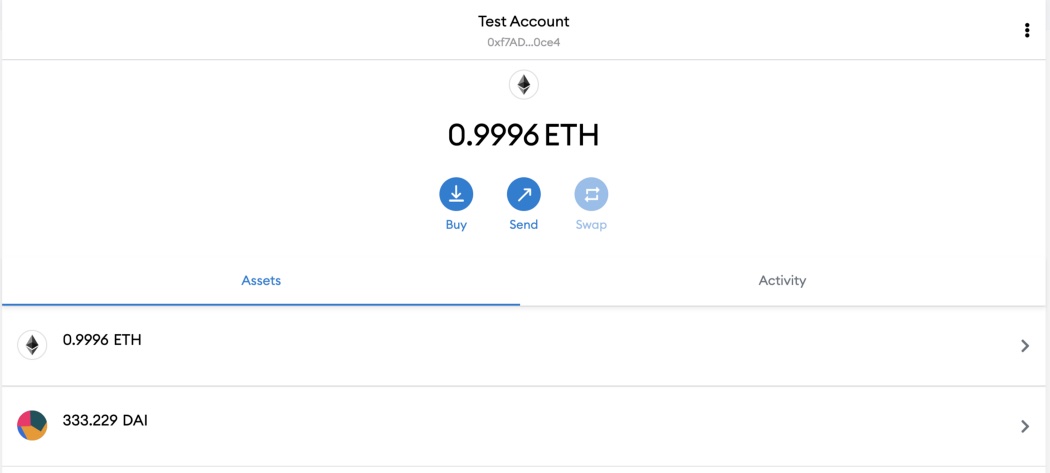
You can check your activity to monitor the transaction, and it may take a little bit for it to be mined. Once the transaction has gone through, you’ll see that you have less ETH (since you sent it away), but you won’t see your DAI token yet. This is because metamask only supports the native token for the given network out of the box, and we have to set up viewing another token.
To do this, go to your Assets tab and press Add Token. The deployed contract address for Kovan DAI is 0x4F96Fe3b7A6Cf9725f59d353F723c1bDb64CA6Aa, so set that as the token contract address. The other two fields should autopopulate, and then you can hit Next. You should see the balance of DAI you have in your wallet, and then hit confirm to finish adding the token. Now if you go back to your account, you should see both ETH and DAI listed as assets.
Set up Infura Account
The next step is to set up an account with Infura so that we can get a free project ID to use for their API. Infura is one of many APIs that allow us to interact with the blockchain. Go to https://infura.io and sign up, create a project, then grab your project ID. We’ll be using Infura’s API in conjunction with web3 to programmatically check our wallet balances on the blockchain.
View Native Token Balance
Now that we have our test wallet and infura project ID, we can actually start programming, using web3.js.
The web3.js library is a collection of modules that contain functionality for the ethereum ecosystem.
First step is to add it to our project.
yarn add web3
In order to actually use web3 to interact with the blockchain, we have to set up a web3 instance with a provider. Our provider will be an HttpProvider which comes with web3, and we'll use the Infura API with our projectId as the Ethereum node. This will look something like this:
const provider = new Web3.providers.HttpProvider(`https://kovan.infura.io/v3/${YOUR_PROJECT_ID}`);

const web3 = new Web3(provider);
Now that we have it set up, getting the native token balance of our wallet is super simple.
const balance = await web3.eth.getBalance(YOUR_WALLET_ADDRESS);
If you log what is returned here, you’ll notice that the number returned is waaaaay larger than the number you see in metamask as your ETH balance. This is because by default, Ethereum returns wei, which is approximately 10¹⁸ ether.

Web3 surfaces a set of utils that allows us to convert this easily, so we can call web3.utils.fromWei to get our balance in ethers.
const balance = web3.utils.fromWei(await web3.eth.getBalance(YOUR_WALLET_ADDRESS));
Now it should match the balance you are seeing in metamask:

View Kovan DAI Token Balance
Just like with getting and viewing Kovan DAI in our wallet, getting your balance using web3 isn’t quite as simple as it is with the native token. In order to do that, we first have to set up a web3 Contract instance using the ERC20 token standard ABI and the Kovan DAI token address.
ERC20 is a type of token contract that lives in Ethereum, and the ABI (Application Binary Interface) is the specification for the contract. These ABIs are public, and you can find the ERC20 ABI in a lot of different places. I have it listed in the the GitHub repo for this post here. You’ll need to copy that whole file and add it to your project, and then use it as part of the definition of the Contract instance.
The Kovan DAI token address is just the address of the token smart contract that is deployed on Kovan. It's the same address we used above to add Kovan DAI to our metamask wallet for viewing: 0x4F96Fe3b7A6Cf9725f59d353F723c1bDb64CA6Aa.
Now that we have these two values, we can create a token contract instance, which looks like this:
const tokenContract = new web3.eth.Contract(ERC20ABI, DAI_TOKEN_ADDRESS);
We can now use this token contract to invoke functions on the token. The one we will be using is balanceOf, but if you look at the DAI token on Etherscan, go to the Contract tab and look at the Read Contract and Write Contract sections, you can see all the possible functions and even test them out. Invoking this function using web3 looks like this:
const balance = await tokenContract.methods.balanceOf(WALLET_ADDRESS).call();
As we saw with the native token, we will get the balance back in wei, so we need to do the conversion using the fromWei util again. After that, we should see the same Kovan DAI balance that we are seeing in metamask.


