Headless Browser testing with CircleCI 2.0
Here at Echobind, we’ve setup many greenfield applications. Continuous integration is one of the first steps we take to ensure the quality of the app improves over time. We prefer CircleCI, and recently, version 2.0 of their platform was released.
Given that Ember 2.15.1 supports headless chrome out of the box, I decided to use that framework here to get going quickly.
EmberCLI Goes Headless
If you’ve been working in Ember for several years, you probably have had to deal with many weird PhantomJS errors. For example, Array destructuring is not supported in Phantom JS 2.1.1. Well, those days are over.
Recently headless chrome was made the default to the testem.js file that gets included in your app when you create a new project. This means we can now utilize headless chrome for our tests.
CircleCI and Browser Testing
CircleCI supports browser testing out of the box.
If you clicked the link above, you’re taken to a Selenium article. What is that? Don’t worry about it. The useful piece of information is this:
The primary image has the current stable version of Chrome pre-installed (this is designated by the -browsers suffix)
This means, that your .circleci/config.yml file needs to utilize an image with the -browsers suffix. A little more on that later.
Setting up CircleCI
First things first. I have a sample project for you to check out, that contains the configuration needed to get CircleCI 2.0 running your tests here.
Prerequisites
- You have a CircleCI account
- Allowed CircleCI to your Github account
- Your application is using Github
If you want to skip the below, feel free to do so. I’m going to guide you on setting up your project in CircleCI before configuring your project.
Adding your project to CircleCI
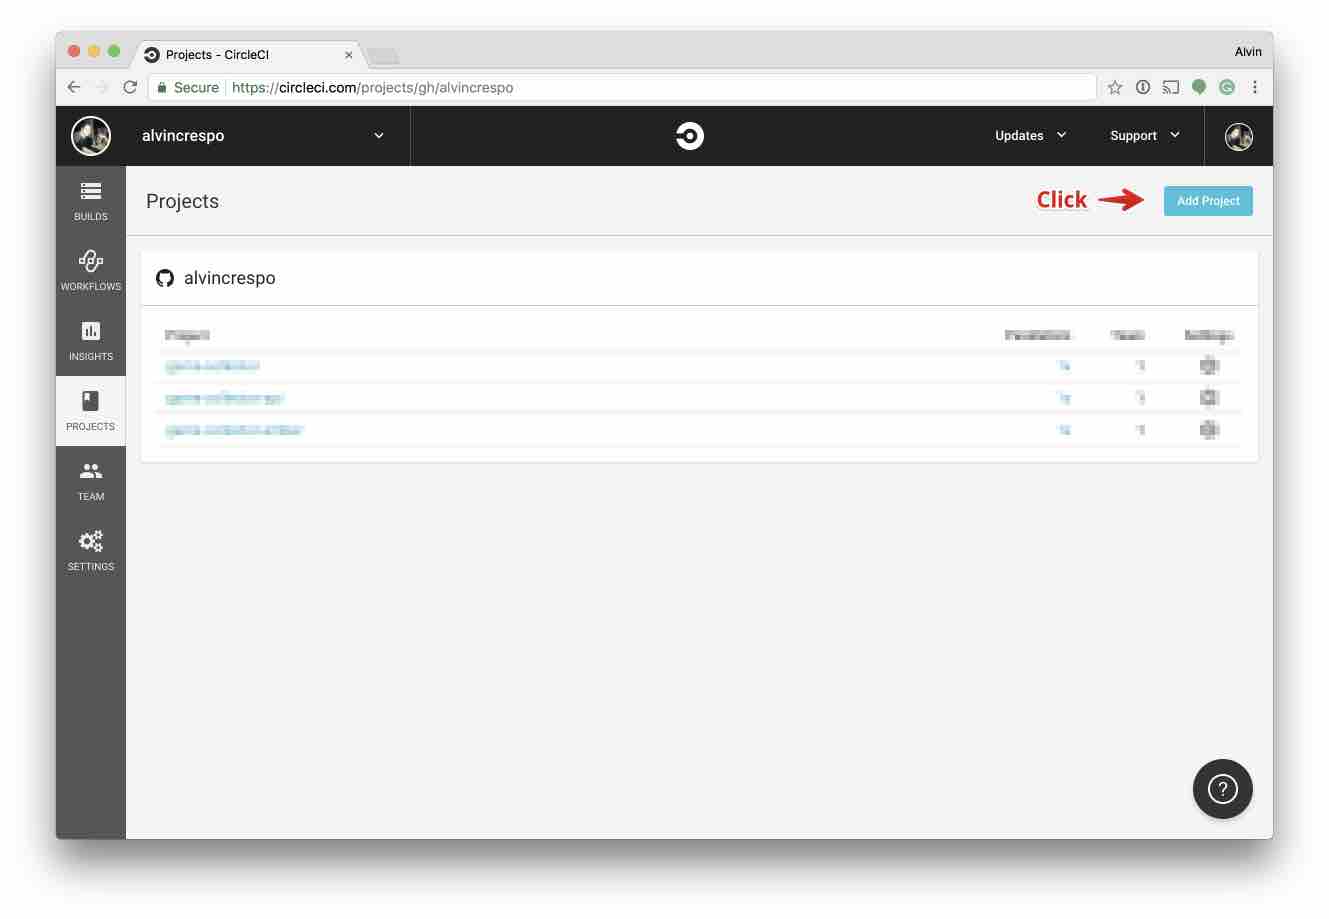
So if you have a project that is not running in CircleCI, you’re going to have to add your project:

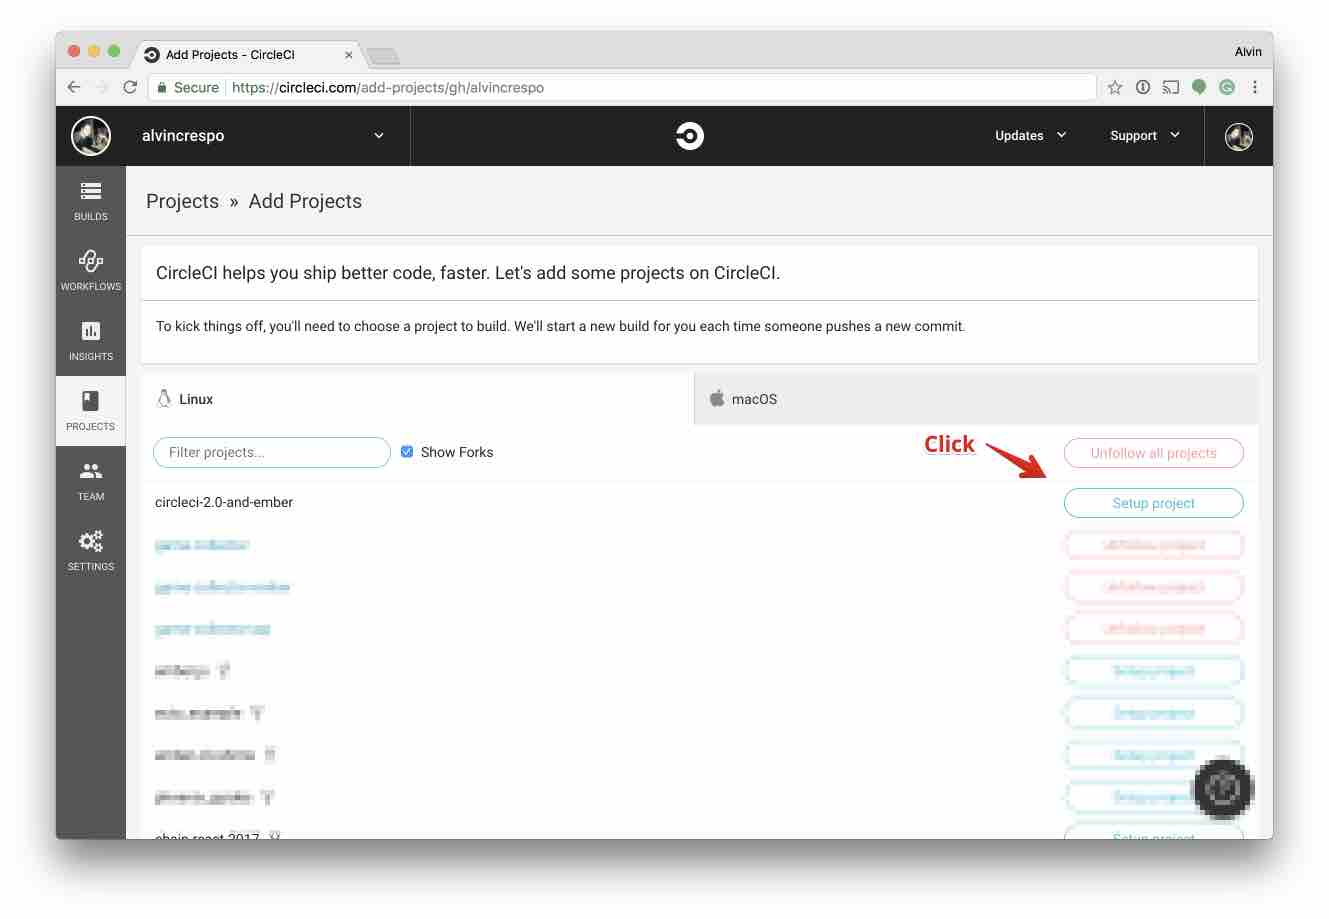
Once you do that, you’ll be taken to a page with all your projects listed. Click on “Setup project” to the right of the project you want setup:

When you click on “Setup project”, you’re taken to the setup-project page where you configure the settings for your project. For my project, I want it to run on:
As you see here, if you’re project contains a package.json file, CircleCI will pick that up and automatically asume you want Node, Linux and 2.0 will be selected for you:

Once that section is done, scroll down to see what you need to configure in your project to get things running:

As it states here, we need to do a couple of things:
- Create a .circleci/config.yml file
- Copy/Paste the default contents provided by CircleCI
- Start the build
So let’s leave this page for now and setup the configuration in our project.
Configuring CircleCI in our project
If you’re in your project, you’ll want to do this:
mkdir .circleci && cd .circleci && touch config.yml
Once you have the directory and file created, you’ll want to add the default contents that CircleCI provided you to the .circleci/config.yml file.
We won’t go into detail about the configuration options here, that’s for a later discussion. We do want to simplify what’s here and get the basics rolling, so here is a configuration I put together:
: 2
jobs:
  build:
    docker:
      - image: circleci/node:7.10.1-browsers
    steps:
      - checkout
      - restore_cache:
          keys:
          - v1-dependencies-{{ checksum "package.json" }}
          - v1-dependencies-
      - run: yarn install
      - save_cache:
          paths:
            - node_modules
          key: v1-dependencies-{{ checksum "package.json" }}
      - run: yarn test
There aren’t many differences than what CircleCI provides you by default. But we do see that the docker image we use is different:
circleci/node:7.10.1-browsers instead of image: circleci/node:7.10
Remember, when we utitlize the -browsers suffix, we're telling CircleCI to fetch the image that contains node 7.10.1 with the browsers pre-installed. This means we get browser images for free, and we don't have any setup!
This is all you need to do to get going with CircleCI.
Note: If you’re interested in trying out other images, here is the repo with all the images youc an use for Node: https://hub.docker.com/r/circleci/node/
Getting our builds to pass
Lets go back to CircleCI, we should be here:

Click on “Start building”. When you do that, your builds will most likely fail. That’s because you haven’t pushed your CircleCI configuration. So let’s push up those changes and see what happens:

Ah, our builds pass!
And we can verify our builds are working because yarn test was run and exited correctly:

TL;DR
Getting Ember and CircleCI to work in harmony is easy. EmberCLI’s latest release and CircleCI’s latest platform update means you spend more time building your app.
References
Ember 2.15 and 2.16 Beta Released
Switch to headless chrome instead of phantom on testem & travis
Getting Started with Headless Chrome
Install and Run Selenium to automate browser testing


